Printable Cases by Category Assignment
To run this report:
- Click the Reporting Menu in ENCOR Hospital Abstracted Measures
- From the drop-down menu, hover over Data Quality
- Select Cases by Category Assignment

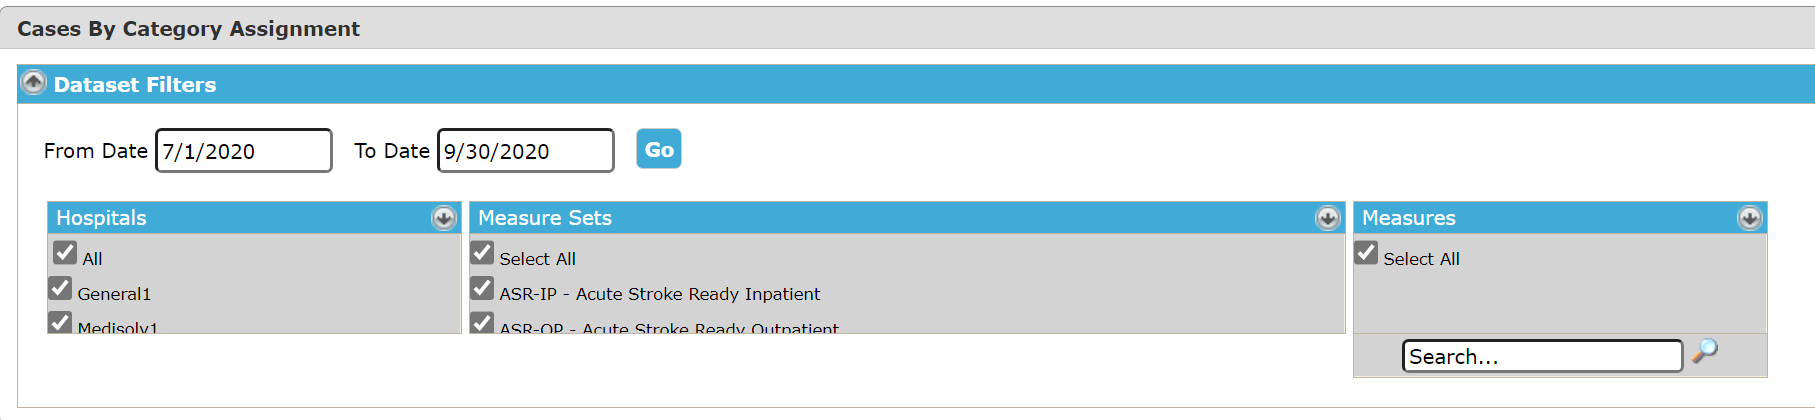
- Enter the Date Range
- Select Hospitals for Multi-Hospital Facilities
- Select Measure Sets or Individual Measures in the dataset filters (optional)
- Click ‘Go’
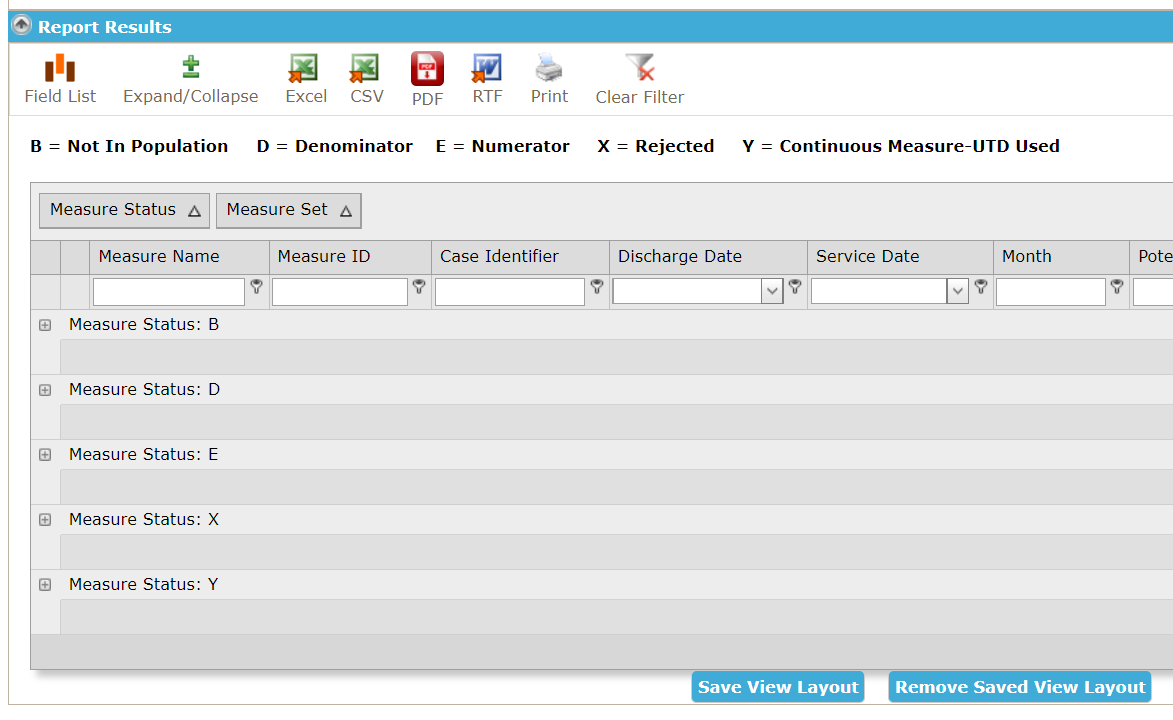
The report will display Measure Status (Category Assignment).
Measure Status B = Excluded from the Measure Not in the Population
Measure Status D = Denominator Case
Measure Status E = Numerator Case
Measure Status Y = Median Time Measure (Continuous Measure) with a UTD Value
Measure Status X = Rejected Case (the case has a Critical edit and will be rejected at CMS)
Measure Category Assignments ‘Y’ and ‘X’ cases should be investigated for accuracy.
You can drill down to view individual cases. Click on the (+) symbol next to Measure Status ‘Y’ and ‘X’ to expand your view, and again on Measure Set.
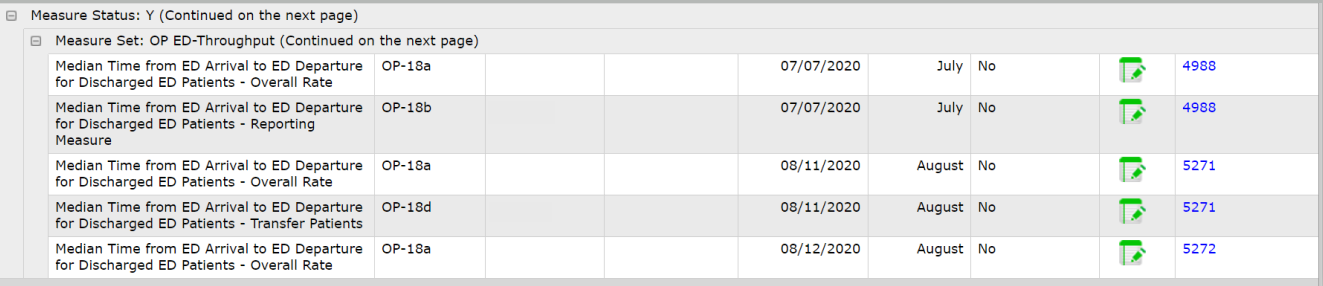
Measure Category Assignment ‘Y’ cases reflect the usage of allowable value ‘UTD’.
Measure Category Assignment 'X' cases should be investigated and corrected. The case has a Critical edit and will be rejected at CMS.
- Open the abstraction(s) using the abstraction icon (open in new tab or new window by right-click and select option) to verify the usage of the allowable UTD value ('Y') or correct identified rejections ('X').
- There are two ways to identify outliers using the Potential Outlier field:
- Type 'Yes' into the Potential Outlier filter

- Drag and Drop Potential Outlier to the left of Measure Status and look only at 'Yes' Potential Outliers

- To open the Abstraction Worksheet on each case – right click the Abstraction icon and choose Open in New Tab (CTRL + Click Abstract Icon) or Open in New Window (SHIFT + Click Abstract Icon) to maintain the integrity of the report.

This report can be set-up in the desired format using grouping and sorting. Once set-up, Save View Layout will make these selections the default layout the page opens in.

The below pop-up appears after a View is saved.

- To Remove a saved layout, click Remove Saved Layout. The below pop-up or something very similar, depending upon the browser type, is displayed. Click OK to remove the saved view.

This report has a 30 minute cache.